Nylas recently launched our API v3 and we also released updated versions of our Nylas SDKs. We will be using the Nylas Node SDK to create webhooks using Hookdeck for testing and inspecting the webhooks themselves.
In this blog post, we’ll dive into how to use and set up Nylas webhooks in API v3 using Hookdeck!
Setting Up Nylas Webhooks with Hookdeck
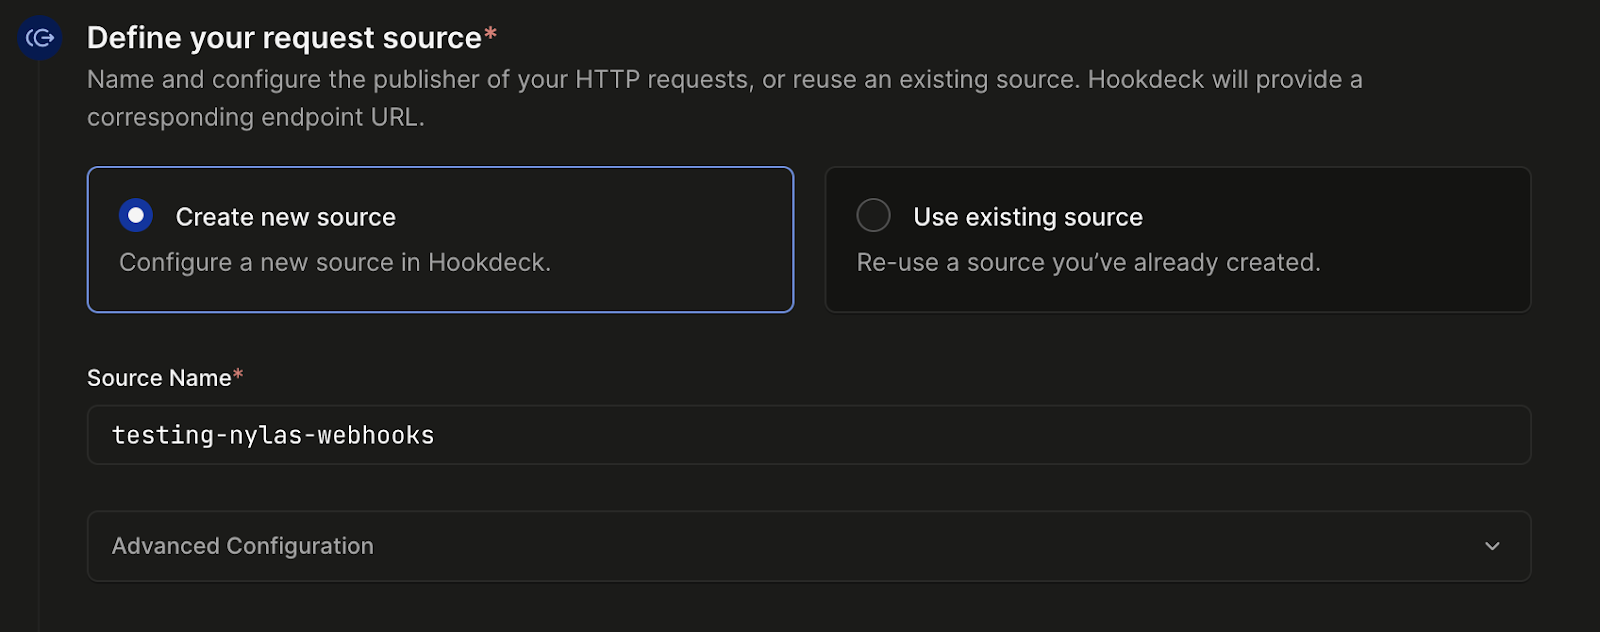
We will first use Hookdeck to set up an endpoint for registering and receiving webhooks. So create a new connection in Hookdeck and call it testing-nylas-webhooks:
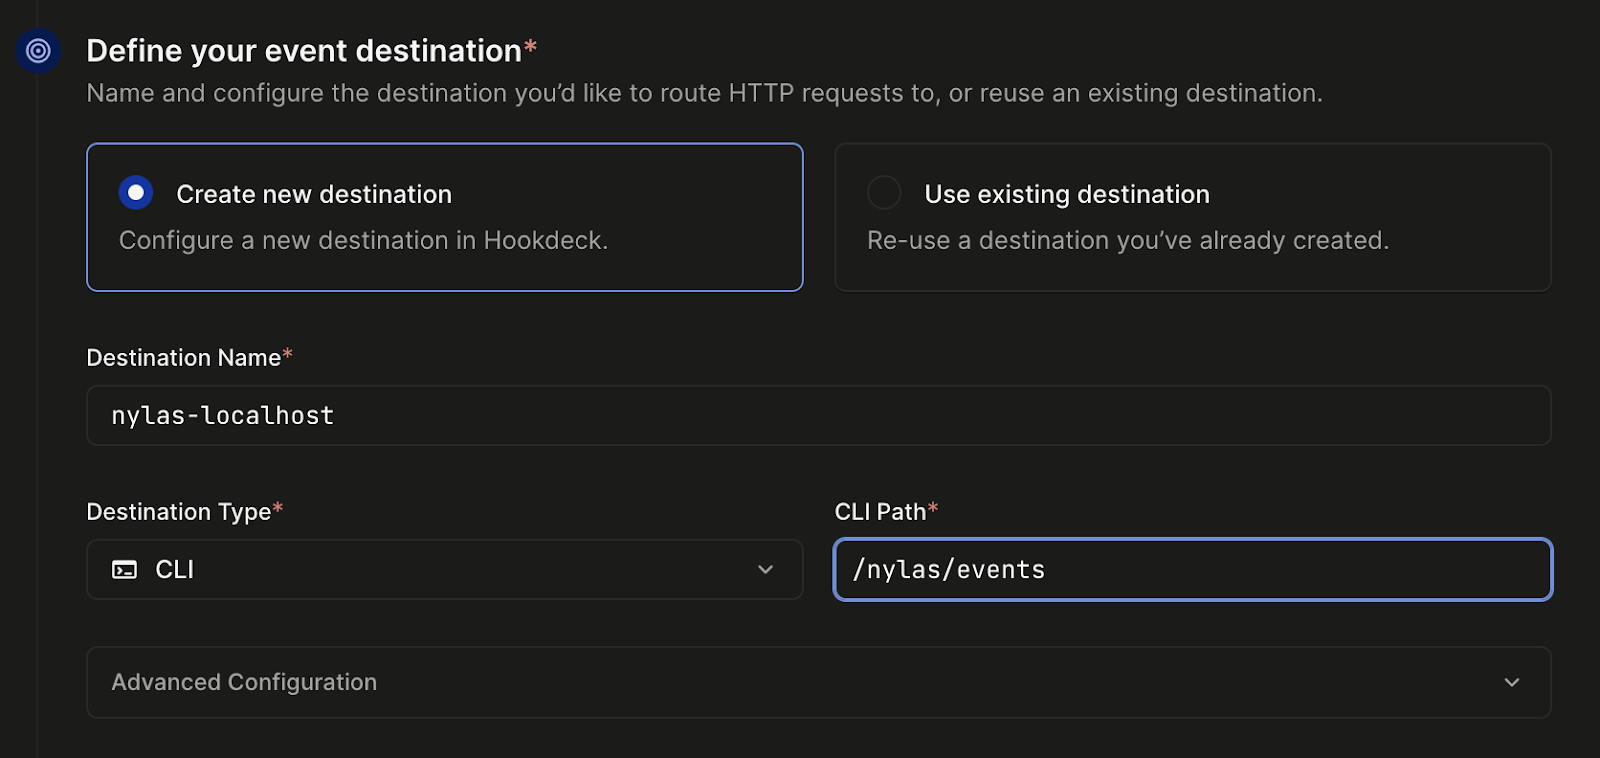
For the next section, define your event destination, let’s set up the destination as CLI (localhost) to test webhook locally:
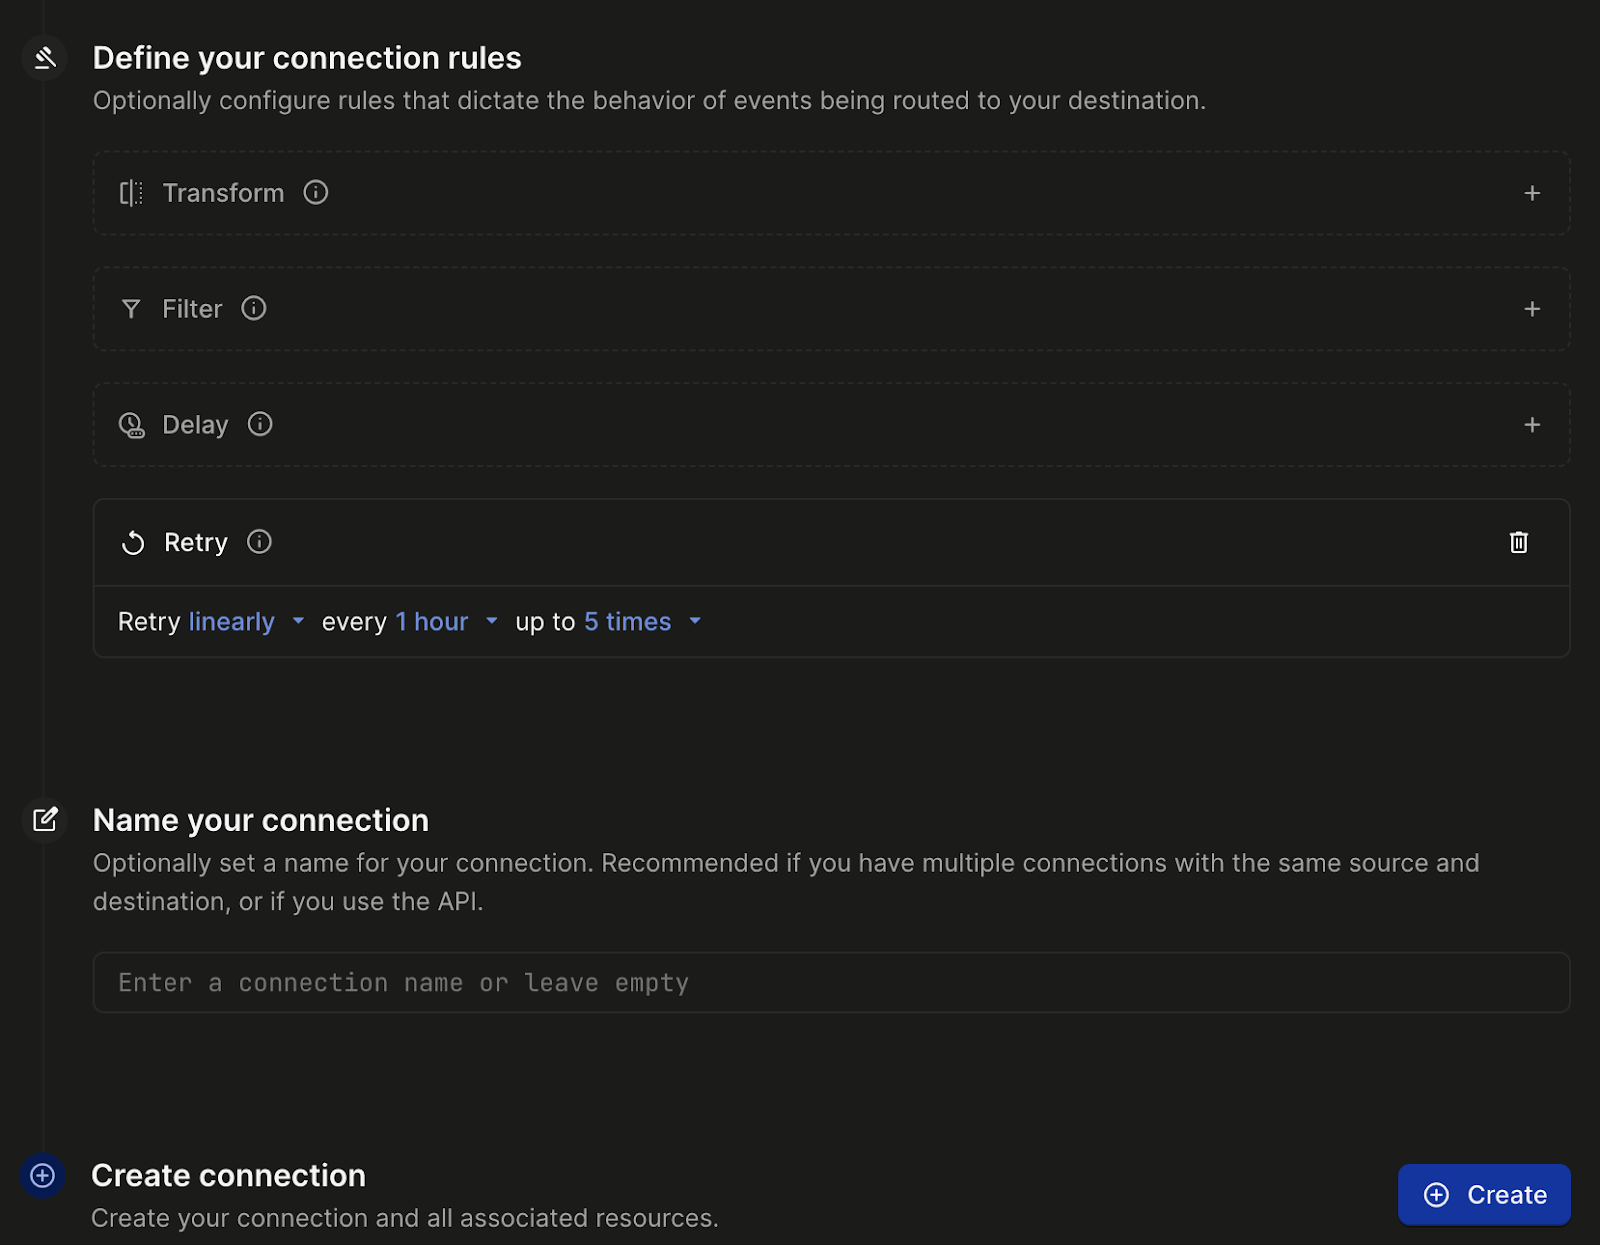
We will keep the connection rules and name unchanged, and click Create:
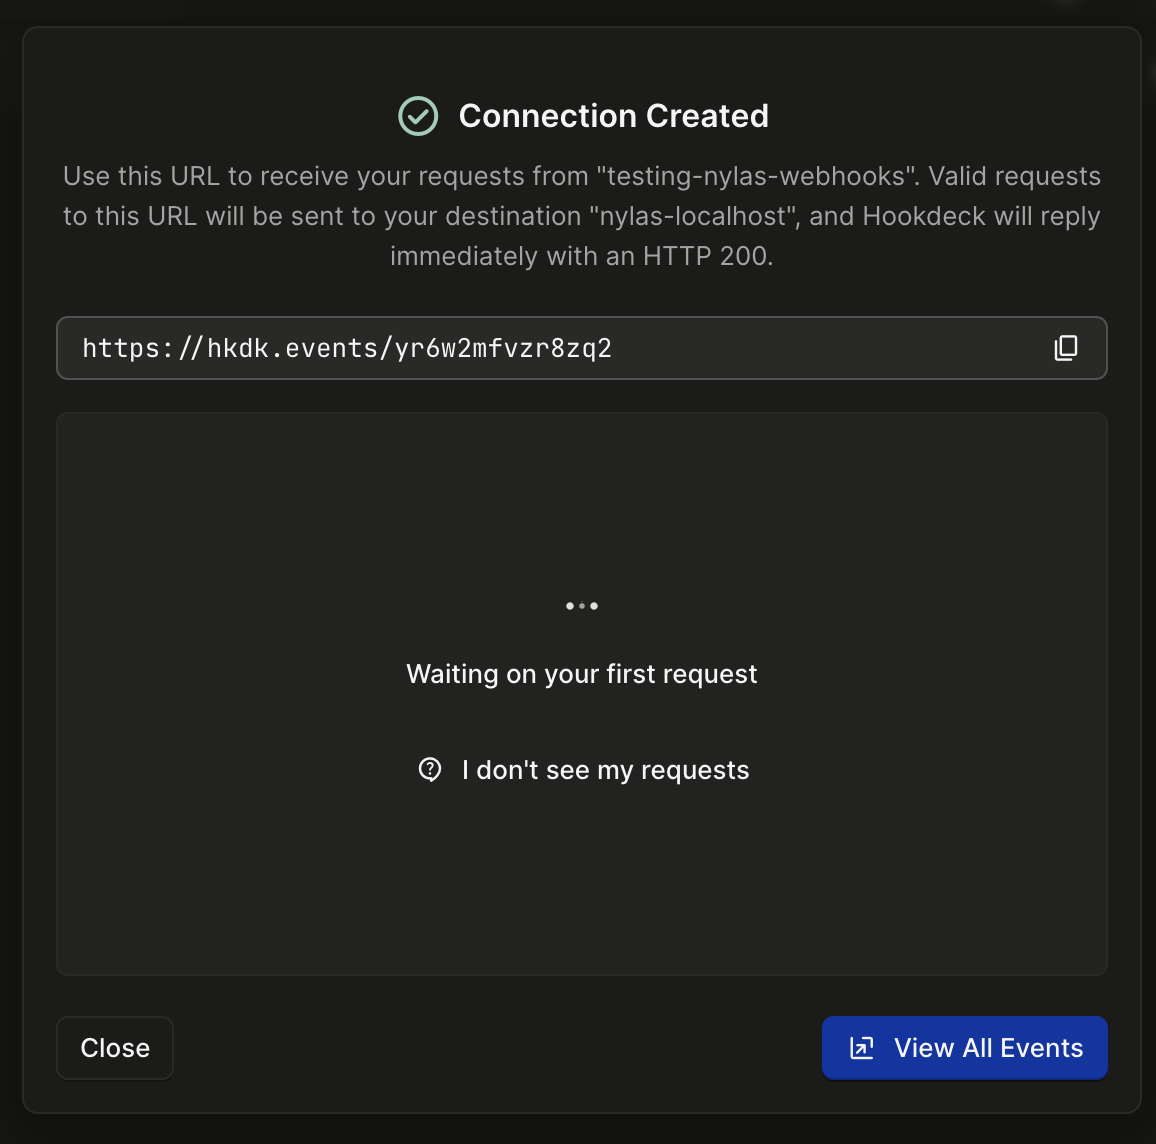
Now we will be given the webhook URL to receive webhooks from Nylas:
In the upcoming sections, this URL is used as an environment variable, NYLAS_WEBHOOK_URL. Now that we have created the initial webhook URL.
Configuring Your Webhook in Hookdeck
So we have an active endpoint, and when Nylas receives a create webhook request from us, to ensure the endpoint is active we must respond with the query challenge. Hookdeck will handle authenticating or handshaking with Nylas webhook automatically, so we are not required to complete any additional steps here.
After successfully setting up the webhook, each subsequent call will not contain the query challenge, where Hookdeck will respond with a status 200 to notify Nylas that the webhook event was received successfully.
Now we have completed setting up Hookdeck and are ready to test creating a Nylas webhook.
Testing Nylas Webhooks with Hookdeck
Let’s look at how to create a Nylas webhook using the endpoint, NYLAS_WEBHOOK_URL, that we created on Hookdeck in the previous sections.
Separately, we can also setup a webhook using the Nylas Dashboard:
With Hookdeck setup automatically handle the query challenge sent by Nylas, we are able to successfully create a Nylas webhook. Note the the webhookSecret value is used for securing Nylas webhooks.
In this code sample, we requested a notification any time a new event (event.updated) is created for a user that has connected their account. Here is a full list of webhook triggers. The general approach we will take next is as follows:
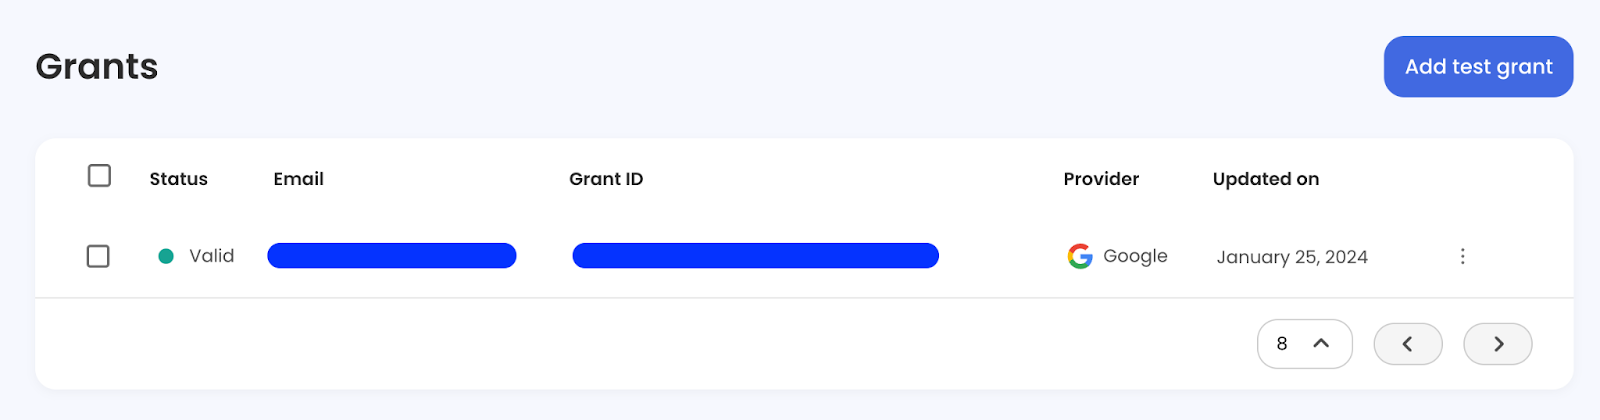
We need a user grant to test out creating an event. Take a look at our documentation on how to create a test grant using the Nylas Developer Dashboard.
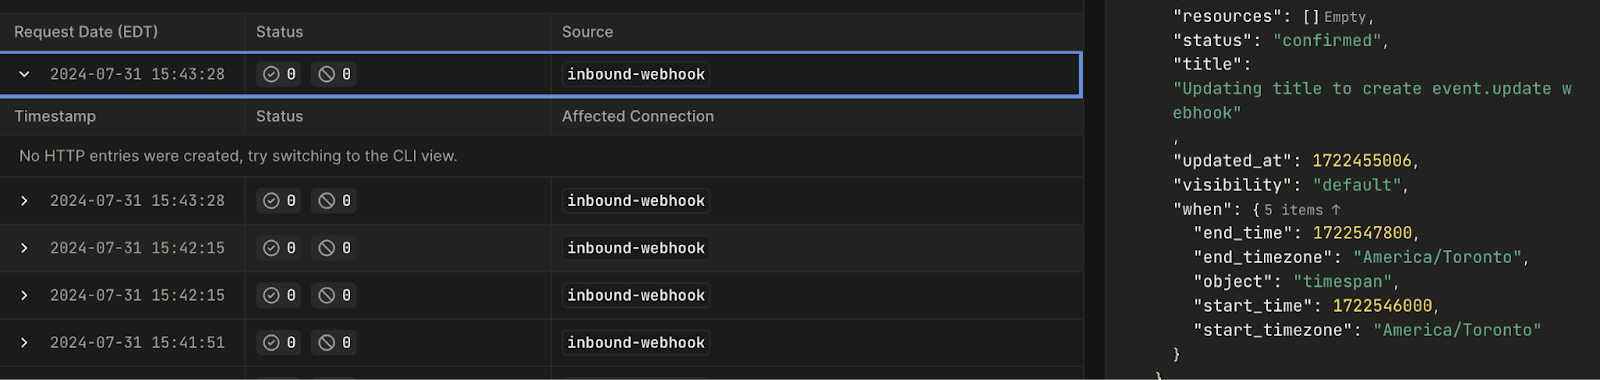
Once we update an event, we can observe the webhook being received on Hookdeck.
As an example, I have created a grant for my Gmail account:
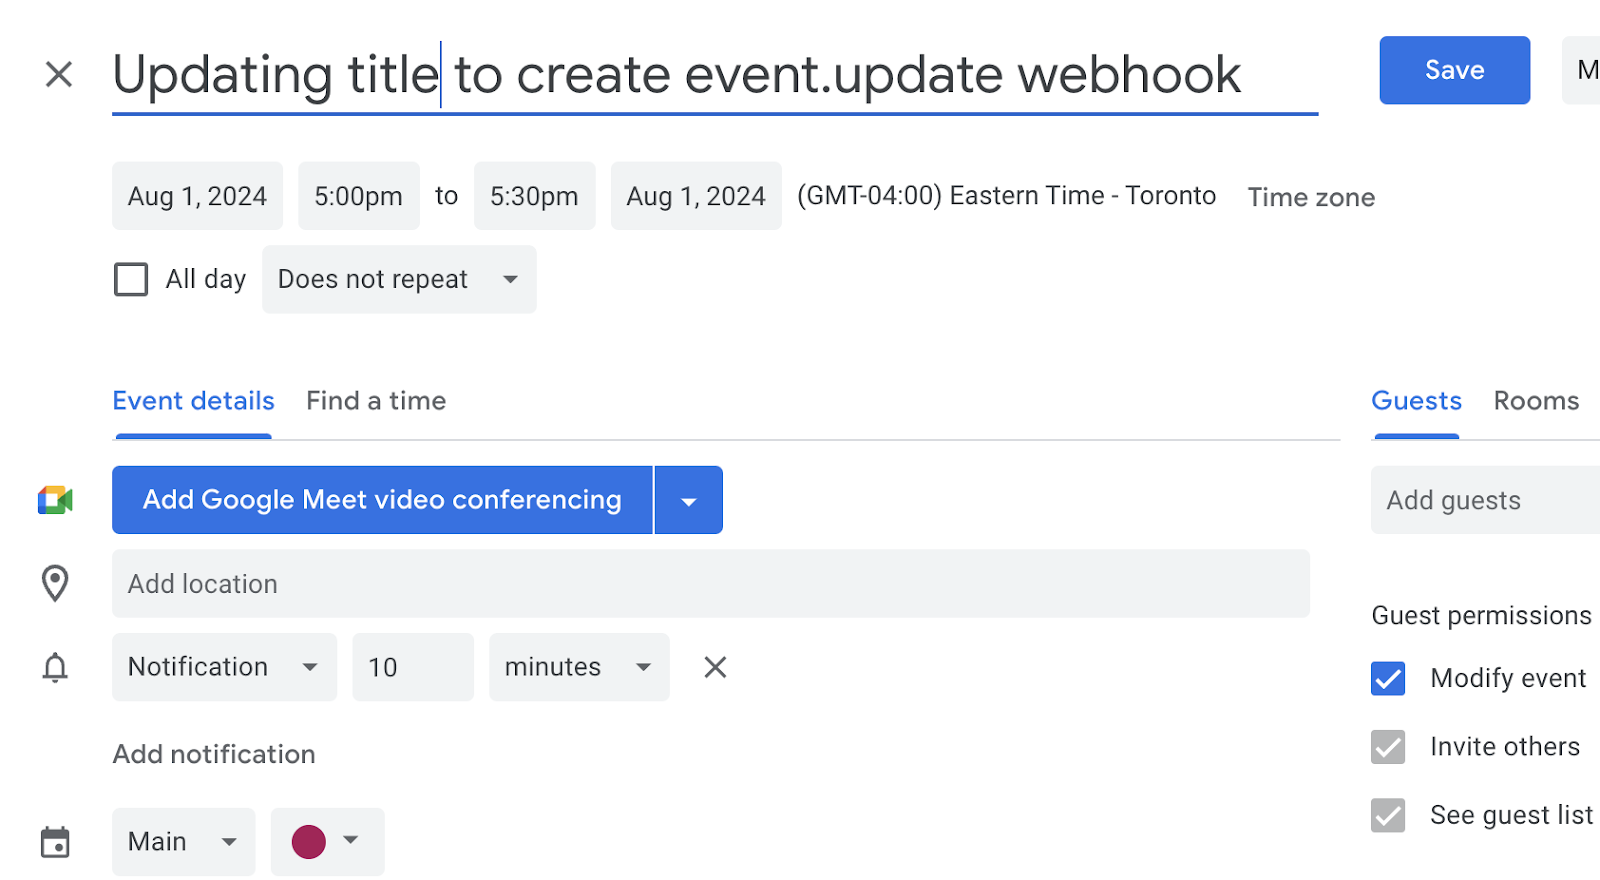
So to try this out we can update an event via Google calendar:
And this will generate a new webhook event in Hookdeck showing the updated title parameter:
In this section, we set up a Nylas Webhook to send notifications anytime a connected user’s calendar events are updated.
 Email and Contacts API
  Calendar API & Scheduler
  Notetaker API
  Agent Accounts